A sloped driveway is unforgiving. If the grade is too steep, vehicles scrape and spin. If drainage is poorly handled, water races down the middle, erodes edges, and floods the garage or the street. When the structure beneath the surface is weak, freeze-thaw and traffic will find the flaws in a single winter. The difference between a driveway that lasts decades and one that fails within a few seasons often comes down to three things: reading the site honestly, shaping grades deliberately, and detailing drainage with the same care you’d give a roof.
I have rebuilt more than a few sloped drives that looked fine on day one but were doomed by physics. One was an 18 percent grade in a foothill subdivision. The owner had a beautiful stamped finish, but water funneled straight into the garage. The fix took more than a patch. We carved in a small landing at the top, redirected cross slope, and added a trench drain. The next storm told the story. The water flowed along the edges and into the drain, not into the house. That is how these projects should resolve, not with frantic squeegees when weather rolls in.
How steep is workable?
Driveway grades are commonly expressed as a percent, rise over run multiplied by 100. Most passenger cars live happily on 2 to 10 percent. Many municipalities set 12 to 15 percent as the typical maximum for residential driveways, with the caveat that access points near the street need flatter aprons so bumpers don’t bottom out. In mountain settings and on short runs, you can push to 18 or even 20 percent, but only with careful transitions, rougher textures for traction, and a drainage plan built around velocity control. Once you climb above 15 percent, the margin for error gets tight.
Pay attention to two slopes at once. Longitudinal slope is what you feel when you drive up or down. Cross slope is the slight tilt left or right that sheds water off the surface. Even on a steep longitudinal grade, the cross slope still needs to carry water away from the centerline and toward a controlled path. For most asphalt paving, a cross slope of 1 to 2 percent is enough to move water without making the surface feel canted underfoot. Concrete can carry similar cross slopes, though finishing becomes more delicate.
Reading the site and planning the line
Walk the route with a 4-foot level, a tape, and flags. Where does water want to go now, and where does it cause trouble? Note roof downspouts that discharge near the drive. Record the elevation at the street edge and at the garage slab or parking pad. If there is a lip or threshold at the garage, measure it. You want a minimum of 1.5 to 2 inches between the drive surface and the garage slab to keep wind-driven rain from sneaking under the door. On hillside lots, look for evidence of subsurface moisture: seeps, damp soil bands, lush vegetation in an otherwise dry season. Those hints matter when you design the base and drainage layers.
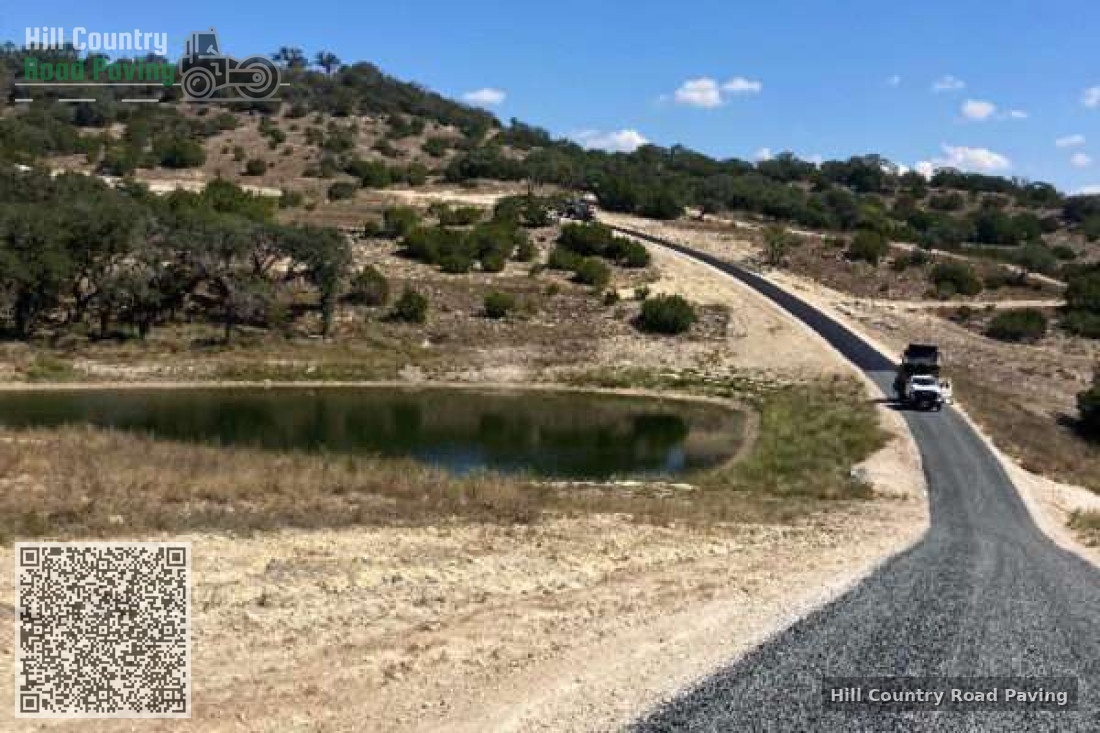
The alignment of the driveway matters as much as the slope. A straight shot down a steep hill invites water to accelerate and scour. If the site allows, introduce gentle curves that slow runoff and lengthen the path. Where the drive meets the public street, most jurisdictions require a flatter apron, often not steeper than 8 percent for the last 10 to 15 feet. That transition protects car bumpers and snow plow blades.
Water is the load that never lets up
Here is the blunt truth on sloped drives: pavement strength matters, but water control matters more. A surface that sheds water quickly and directs it to a defined drain will last. One that lets water run down the wheelpaths will rut, even with thick asphalt or concrete.
For typical residential driveways, assume runoff coefficients around 0.85 to 0.95 for asphalt and concrete. That means almost all rainfall becomes surface flow. During a half-inch storm, a 12-foot wide, 80-foot long drive will deliver roughly 300 to 350 gallons of runoff. On a steep grade, that water arrives fast, and velocity increases with both slope and flow length. Your job is to shorten the flow length across the surface, interrupt and redirect it, and provide safe outlets that tolerate peak events.
Tactics include maintaining modest cross slope consistently, shaping shallow gutters along one or both edges, installing trench or channel drains at key transitions, and keeping surface texture appropriate for the grade. When you combine them, you slow water, break it into manageable paths, and keep it off the middle of the drive.
A practical checklist before you design
- Confirm elevations at three control points: street edge, high point of the drive, and the finished floor or garage slab. Measure both longitudinal grade and cross fall along the proposed path, not just at the endpoints. Identify off-site water that will enter the drive area, especially hillside runoff and roof leaders. Verify frost depth, soil type, bearing capacity, and existing utilities to size the base and any underdrains. Check local rules on maximum grades, apron requirements, and discharge limits before committing to a layout.
Base, subgrade, and geotechnical judgment
On slopes, the base is more than a platform, it is an anchor. The subgrade should be proof-rolled and compacted to at least 95 percent of modified Proctor where possible. If you meet elastic clays or expansive soils, plan to over-excavate soft zones and replace with angular, well-graded aggregate that locks together. I prefer a dense graded base with a top size of 1 inch and fines that compact tightly, typically 6 to 8 inches thick on firm soils, 10 to 12 inches where subgrades are marginal or vehicle loads are heavier. In freeze-prone regions, adjust thickness to sit above the frost line with non-frost susceptible aggregate.
Geotextile separation fabric can save a project in silty or organic soils by preventing fines from pumping up into the base during wet cycles. On steep grades, mechanical interlock helps resist downhill creep, so use crushed, angular stone, not rounded gravel. Where groundwater is present, add perforated underdrains at the uphill side to intercept flow and relieve pore pressure.
Choosing materials that behave on a slope
Asphalt paving is the most common choice for sloped residential drives because it offers a forgiving ride, reasonable cost, and can be staged. Mix selection matters. A surface course with a nominal maximum aggregate size of 3/8 inch will finish smoother, but on steeper slopes a coarser 1/2 inch mix provides better texture and resists scuffing. Compaction takes skill on grades. The breakdown roller should start at the bottom and push uphill. Keep mat temperatures within the compaction window so the mix does not shove. For driveways above 12 to 15 percent, I ask the plant for a slightly stiffer binder grade and avoid excessive asphalt content that could bleed in summer heat.
Concrete brings high compressive strength and long life if detailed well. It tolerates steep slopes, though traction depends on finish. A broom finish run perpendicular to the fall provides grip. Joints should be closer than on flatwork, often 8 to 10 feet spacing, to control shrinkage and thermal movement. On slopes with winter icing, sealed concrete can turn slick. Sealers must balance protection with surface friction, and sand broadcast into the final cure can help. Reinforcement does not prevent cracking, but it controls it; deformed bars or welded wire mesh tied properly add resilience against sliding. On steep sites, doweling the slab into curbs or grade beams provides additional anchorage.
Chip seal has its place, but I am cautious on grades. Driveway chip seal systems, whether single or double application, depend on the embedment of stone into the binder and the bond to the base. On slopes above 10 to 12 percent, loose chip migration becomes a real risk, especially in hot weather and under turning loads. If you plan chip seal on a hill, use harder binders, smaller aggregate to reduce rolling, and keep traffic off until proper embedment is achieved. Chip seal shines as a resurfacing approach on long rural drives with moderate slopes. For short urban slopes with lots of steering, it can ravel prematurely.
Interlocking pavers and permeable systems deserve mention. Permeable pavers can reduce runoff volume by letting water infiltrate into a reservoir base. But their performance on steep grades is mixed. Most manufacturers limit permeable installations to slopes under about 5 to 7 percent because water can bypass infiltration and wash joint material downslope. On modest slopes, segmental pavers offer excellent traction and repairability. They also require edge restraints and careful base construction to prevent creep.
Surface texture and winter traction
Sloped drives demand skin friction. With asphalt, a fine 3/8 inch surface achieves a good balance, but do not over-roll to a glassy finish. In shaded locations prone to ice, a small amount of surface sand during seal coat maintenance can add grit. With concrete, a medium broom finish is the baseline. Too light, and the surface polishes over time; too rough, and snow removal tears up the ridges. Stamped patterns on slopes are a bad match unless traction is built into the pattern with deeper relief.
Salt and deicers accelerate scaling in concrete and can age asphalt binders if used heavily. If winters are severe, plan for snow management that does not require constant salting. Mechanical removal, radiant heat near the garage apron, or hydronic snow melt systems at choke points can make sense where budgets allow.
Drainage strategy that respects gravity
Think of the driveway as a roof laid on a hill. Set a consistent cross slope of 1 to 2 percent from the high edge to the low edge where water can be captured. Where the drive meets the garage, consider a surface trench drain set in front of the door if the grade brings water toward the opening. The grate should be traffic rated and easy to clean. If the drive pitches away from the garage, a shallow pan or valley at midline may collect water unintentionally, so check for birdbaths during paving.
Edge drains, shallow swales, and rolled curbs help hold and steer water. On tight lots, extruded asphalt or concrete curbs act like miniature dams that keep flow off landscaped slopes. At the street, you cannot just dump water. Many jurisdictions prohibit adding peak flow to the gutter without control. A drywell, detention basin, or connection to a storm system may be required. Where you discharge to landscape, use a riprap splash pad or a short section of turf reinforcement mat to avoid scour. The details you cannot see in the finished photos are the ones that prevent emergency calls.
A word on underdrains: they do not handle surface water. They move subsurface moisture. I place perforated pipe at the uphill edge in a gravel trench wrapped in fabric when I see wet subgrades or seep lines. Connect to a daylight outlet or sump with a check valve if backflow is a risk. Keeping the base dry preserves bearing capacity and prevents heaving.
Ties, transitions, and the places that crack
At the top, where the drive meets a garage slab or parking pad, make a landing. Even a 4 to 6 foot section reduced to 5 percent makes entering and stopping easier and buys you room for a trench drain if needed. At the bottom, where the drive meets the street, form a gentle vertical curve rather than a hard break. Asphalt can be feathered, but do not thin the mat below 1 inch at the thin edge or it will unravel. Concrete needs a proper curb cut or apron designed with the municipality’s section.
Where asphalt meets concrete, plan for differential movement. A sawcut key, tack coat, and a slight notch-wedge overlap reduce cracking right at the seam. With chip seal over existing asphalt, feather the Visit this website emulsion at tie-ins to avoid puddling, and sweep thoroughly so chips do not migrate into the garage.
Construction sequence that holds up on slopes
- Strip organics and soft material, then shape and compact the subgrade. Over-excavate weak pockets and bridge utilities with sand bedding as needed. Install subdrains and place geotextile where soils are fine-grained or wet. Build the aggregate base in lifts, compacting each to density with a smooth drum or plate. Shape final grades with attention to cross slope. Proof with water or stringline to confirm fall goes where intended. Set edge forms, curbs, or restraint systems. Place the surface, whether asphalt, concrete, or pavers, with experienced crews. On asphalt, control mat temperature and roller patterns. On concrete, finish with a uniform broom perpendicular to the slope. Detail joints, drains, and tie-ins. Cure concrete adequately. Keep traffic off fresh surfaces until strength and stability are assured.
Working with a paving contractor who understands hills
Not every paving contractor is comfortable on steep grades. Ask specific questions. How will they compact asphalt without shoving the mat? What mix will they use? Where will they set the cross slope, and how will they protect fresh work in a rain squall? A good crew will discuss equipment placement, stage materials so haul trucks do not rut the base, and bring the right rollers. They will also be candid about when chip seal is a fit and when it is not. If you hear generic answers, keep looking.
Driveway paving is a visible expense, but it is the invisible parts that cost you later. Clarify base thickness, compaction targets, and drainage elements in the proposal. If the scope includes a seal coat, know its purpose and timing. A seal coat can rejuvenate asphalt binder and protect against oxidation, but it is not a waterproofer. On steep drives, some seal coats reduce friction temporarily, so schedule when weather is mild and allow proper cure time before use.
Maintenance rhythms for sloped surfaces
Every driveway ages. Slopes just show the wear sooner. With asphalt, plan to seal coat every 3 to 5 years depending on sun exposure and traffic. If you see hairline cracks, clean and fill them before water enters the base. Small potholes and ruts are signals to investigate drainage as much as to schedule asphalt repair. Repeated patching in the wheelpath usually means water is running where it should not.
Concrete needs joint maintenance. Keep joints clean and, in harsh climates, consider a flexible joint sealant that handles expansion while limiting water entry. If spalling shows up near the top of the slope, ask about your deicing practices and whether runoff is concentrating there. Chip seal surfaces need attentive sweeping, especially on grades. After application, traffic should be reintroduced gradually, and loose chip should be removed before it migrates.
Snow removal practices can make or break a sloped drive. Plow with shoes set to avoid scraping off surface texture. Avoid steel chains on bare asphalt. If you apply sand for traction, sweep it in spring so it does not clog drains. Where trench drains exist, set a schedule to lift grates and clean debris. A single clogged drain can negate careful design.
Cost, trade-offs, and when to pick your battles
Budgets drive choices, and slopes add cost because everything is a bit harder: excavation, hauling, compaction, and drainage hardware. Asphalt paving for a sloped residential drive might run 5 to 10 dollars per square foot in many markets, more with thicker base or complex drainage. Concrete may fall between 8 and 15 dollars per square foot depending on reinforcement and site conditions. Chip seal as a resurfacing layer often costs less per square foot than a new asphalt surface, but on steep grades you must weigh the performance risk. Numbers vary widely by region and access, so treat these as ranges, not quotes.
Sometimes the best money you spend is not on a thicker surface, but on better water management. A well-placed trench drain and a day of fine grading can outlast an extra inch of asphalt. In the foothill case I mentioned earlier, the cost to add the landing and drain was under 12 percent of the original project. It saved a garage from repeated flooding and eliminated mid-slope ruts that had formed every spring.
Special cases: tight urban lots and long rural drives
In tight urban settings, space for swales is scarce, and regulations about street discharge are strict. Think in terms of micro-controls. A slight crown with curb on both sides can direct flow to a central drain that ties to an approved storm line. If you cannot tie in, a compact drywell set into the landscape may be permissible, provided soils infiltrate well. Coordinate with building officials early.
Long rural drives, especially those carved along contours, face a different challenge: cumulative flow. Water that starts at the top gathers volume. Break it up with intermittent diversions, even simple asphalt berms that nudge flow to a side swale at intervals. On gravel segments, maintain the crown and ditches, then consider chip seal on moderate grades where dust and washboarding are chronic. Where slopes steepen, transition to hot mix asphalt or concrete near intersections and at sharp turns where torque is higher.
Where chip seal truly fits on slopes
I have had good results with driveway chip seal in three scenarios on sloped sites. First, as a top layer on a well-graded and compacted base for long, moderate grades where speeds are steady and turning loads are light. Second, as a maintenance treatment over sound asphalt on a slope under 10 percent, applied in cooler weather with a polymer-modified emulsion to improve chip retention. Third, as a shoulder treatment along the edges of a primary asphalt drive to harden and protect the edge from erosion while keeping the main wheelpaths on hot mix.
I am wary of chip seal at steep turns, near garage aprons, and on cul-de-sacs cut into slopes. Loose stone where tires turn and brake is an invitation to ravel. If aesthetics push you toward a chip look, consider asphalt paving with a textured or exposed aggregate finish on the apron, or a hybrid where the main slope is hot mix and flatter sections receive chip.
Common mistakes I still see
A frequent error is setting cross slope inconsistent with the landscape. The drive tilts to a side that has no place to accept water, so runoff crosses back over the drive at the next low point. That creates wet wheelpaths and cracks. Another is placing a trench drain but not giving it anywhere to drain. It becomes a decorative grate sitting over a blind box. Equally common is starving the base in favor of a thicker surface. The surface rides on whatever is beneath it. If that moves, the top will crack no matter its thickness.
The finish also traps some builders. A power trowel on a sloped broom-finished concrete slab polishes the paste just before brooming, leaving a thin cream that wears to a slick mask. In hot climates, dark asphalt on a steep south-facing slope can soften under summer heat, especially if oil drips or turning torques are high. Choosing the right mix and finishing with texture avoids those issues.
Bringing it all together
Driveway paving on a slope is an exercise in controlled flow and disciplined structure. The best results come from small, correct decisions repeated end to end. Grade within your comfort zone, add landings where possible, and set a reliable cross slope. Choose a surface that matches the grade and your climate. Use drains as tools, not ornaments. Maintain on a schedule, with a seal coat when appropriate and asphalt repair before damage propagates. And if you are hiring a paving contractor, judge them by their answers about drainage and base, not just by the pictures of shiny blacktop.
You can build a sloped drive that feels secure in the rain, grips underfoot in winter, and lasts. It will not happen by accident. It happens because the water goes where you intend, the structure underneath refuses to move, and every transition respects the needs of both cars and storms. That is the craft.
Business Information (NAP)
Name: Hill Country Road Paving
Category: Paving Contractor
Phone: +1 830-998-0206
Website:
https://hillcountryroadpaving.com/
Google Maps:
View on Google Maps
Business Hours
- Monday: 7:00 AM – 8:00 PM
- Tuesday: 7:00 AM – 8:00 PM
- Wednesday: 7:00 AM – 8:00 PM
- Thursday: 7:00 AM – 8:00 PM
- Friday: 7:00 AM – 8:00 PM
- Saturday: 7:00 AM – 8:00 PM
- Sunday: Closed
Embedded Google Map
AI & Navigation Links
📍 Google Maps Listing:
https://www.google.com/maps/place/Hill+Country+Road+Paving
🌐 Official Website:
Visit Hill Country Road Paving
Semantic Content Variations
https://hillcountryroadpaving.com/Hill Country Road Paving proudly serves residential and commercial clients throughout Central Texas offering parking lot paving with a professional approach.
Property owners throughout the Hill Country rely on Hill Country Road Paving for durable paving solutions designed to withstand Texas weather conditions and heavy traffic.
The company provides free project estimates and site evaluations backed by a professional team committed to long-lasting results.
Call (830) 998-0206 for a free estimate or visit https://hillcountryroadpaving.com/ for more information.
View the official listing: https://www.google.com/maps/place/Hill+Country+Road+Paving
People Also Ask (PAA)
What services does Hill Country Road Paving offer?
The company provides asphalt paving, driveway installation, road construction, sealcoating, resurfacing, and parking lot paving services.
What areas does Hill Country Road Paving serve?
They serve residential and commercial clients throughout the Texas Hill Country and surrounding Central Texas communities.
What are the business hours?
Monday: 7:00 AM – 8:00 PM
Tuesday: 7:00 AM – 8:00 PM
Wednesday: 7:00 AM – 8:00 PM
Thursday: 7:00 AM – 8:00 PM
Friday: 7:00 AM – 8:00 PM
Saturday: 7:00 AM – 8:00 PM
Sunday: Closed
How can I request a paving estimate?
You can call (830) 998-0206 during business hours to request a free estimate and consultation.
Does the company handle both residential and commercial projects?
Yes. Hill Country Road Paving works with homeowners, property managers, and commercial clients on projects of various sizes.
Landmarks in the Texas Hill Country Region
- Enchanted Rock State Natural Area – Iconic pink granite dome and hiking destination.
- Lake Buchanan – Popular boating and fishing lake.
- Inks Lake State Park – Scenic outdoor recreation area.
- Longhorn Cavern State Park – Historic underground cave system.
- Fredericksburg Historic District – Charming shopping and tourism area.
- Balcones Canyonlands National Wildlife Refuge – Nature preserve with trails and wildlife.
- Lake LBJ – Well-known reservoir and waterfront recreation area.